
Palia’s new Elderwood update comes with an entire new region that you can explore, but you’ll need to unlock each of the fast travel points manually. I’ll get straight to the point and show you exactly where each of them can be found!
Getting to Elderwood
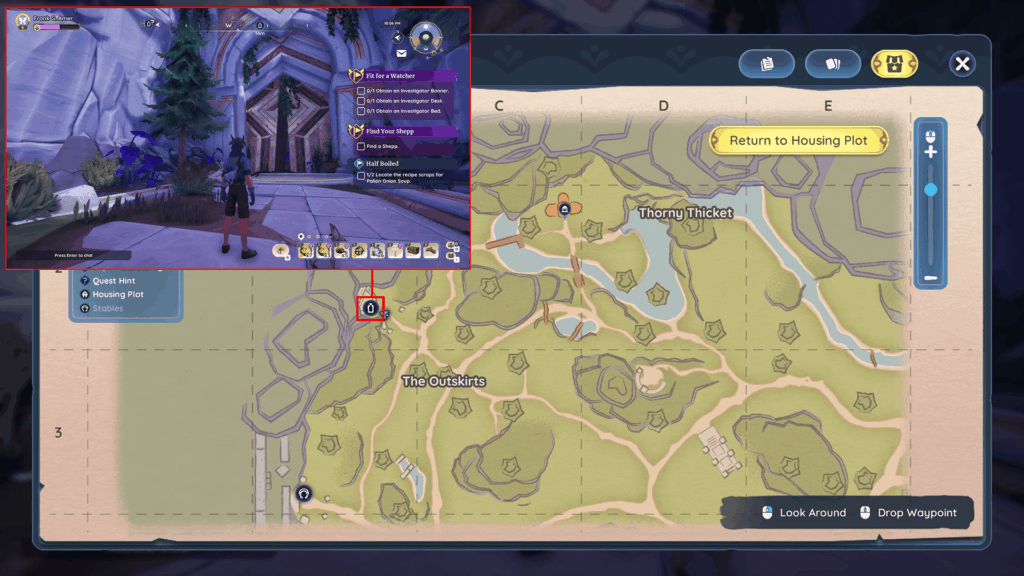
First, if you still haven’t been to Elderwood, you can get there by traveling to Bahari Bay and going through the gate at the B2 quadrant on the map, southwest of Tamala’s house.
Just walk through. You don’t need to do the main quest related to the new area to access it. Case in point, I’m showing you how to do these without reaching that part of the story yet (I’m close though)!
Stable #1 – Central Stables
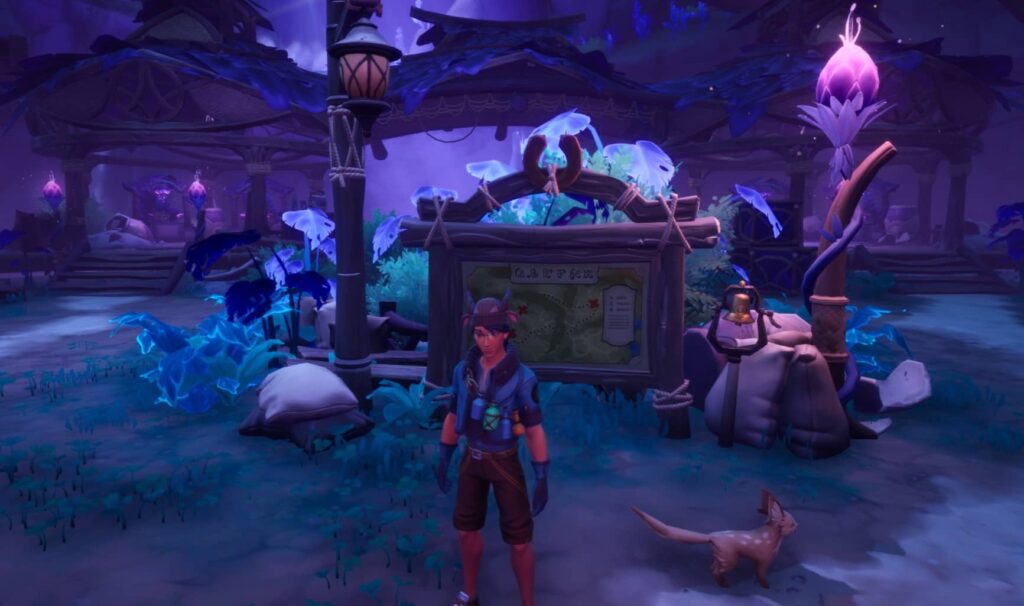
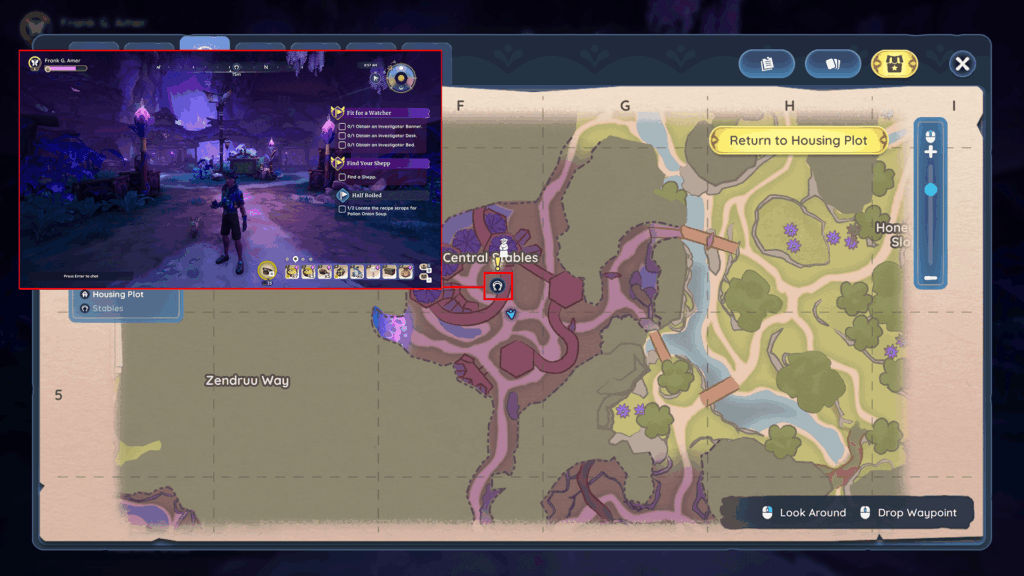
As soon as you enter the Elderwood zone, make your way to the Central Stables area to the west. This is the main hub area of the region, and you’ll find the sign right in the middle, right beside some blue glowing plants.
Just like in the other regions, this is gonna be where you’ll teleport to whenever you’re fast traveling from a different zone.
Stable #2 – Mitana Grove
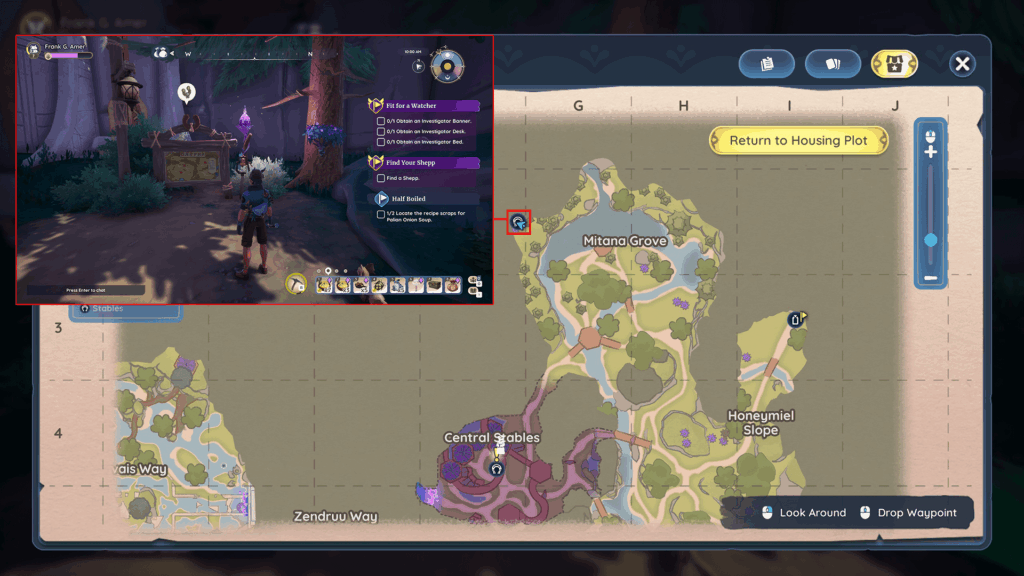
From the Central Stables, make your way north to Mitana Grove. As soon as you exit the cave, climb up the rockface to your left and keep running north. You’ll find the next stable up ahead, and if you check the map, it’s at the top left corner of the grove.
Go ahead and unlock it, then fast travel back to the Central Stables if you have gold to spare. There are no more stable signs up here.
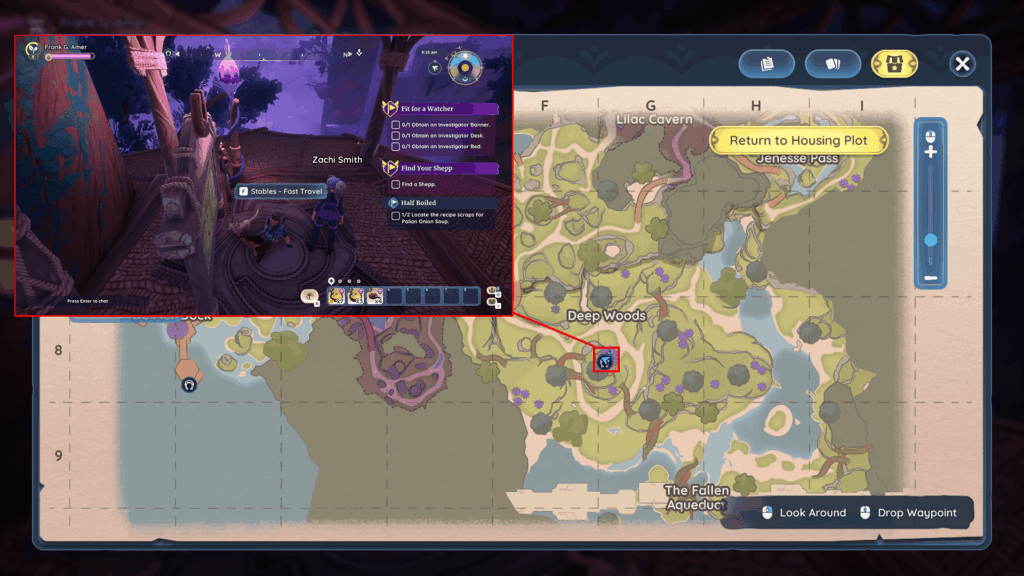
Stable #3 – Deep Woods
Now, from the Central Stables, head straight south to the Deep Woods. If you open the map, you’ll notice that there’s a purple hut there, right under the “Deep Woods” text. That’s our next stop, but it’s a little more complicated than it seems.
You see, it’s high up on one of the excessively tall trees in this area. Head to that tree and use the mushrooms growing on its sides to climb up. Take your time, because you’ll likely need to fully regenerate stamina for each mushroom you reach.
Eventually, you’ll make it to the platform up top, where the stable sign is located!
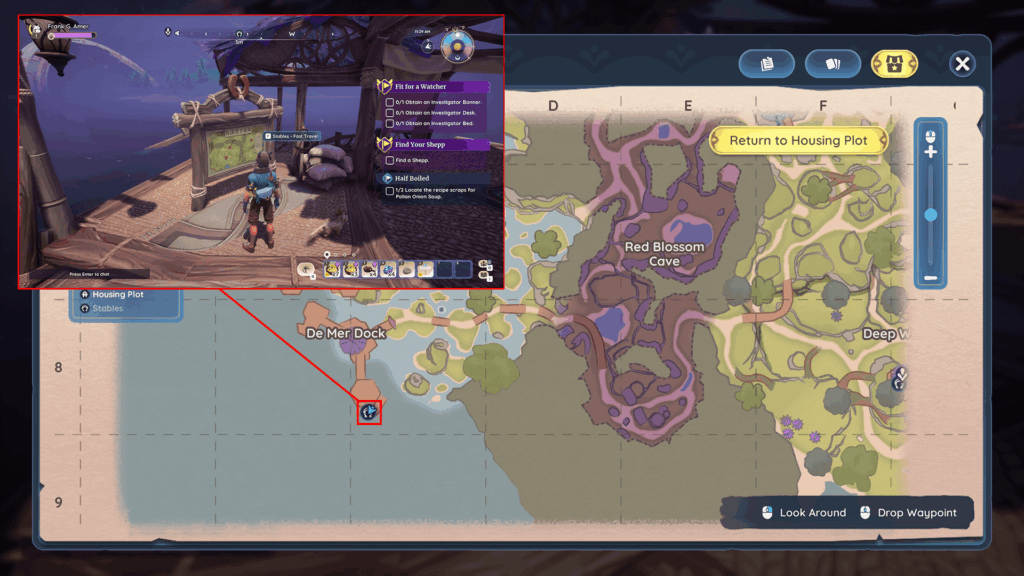
Stable #4 – De Mer Dock
Glide or jump straight down from the previous stable and proceed west through Red Blossom Cave and straight to De Mer Dock. This one’s straightforward as heck, since the stable is found right on the dock itself. It’s on a scenic spot by the water, and you’ll probably already spot it from afar.
Stable #5 – Mauvais Way
Finally, the last stable in the area can be found straight north from the previous one. Run all the way up to Mauvais Way until you reach the part that I marked in the map below. As you approach that spot, you’ll find a few large tree roots that’ll help you reach high ground.
Follow these roots and then climb the short rockface or the tree itself to find the final stable! This one was a bit tricky to find because it’s hiding behind an enormous tree!
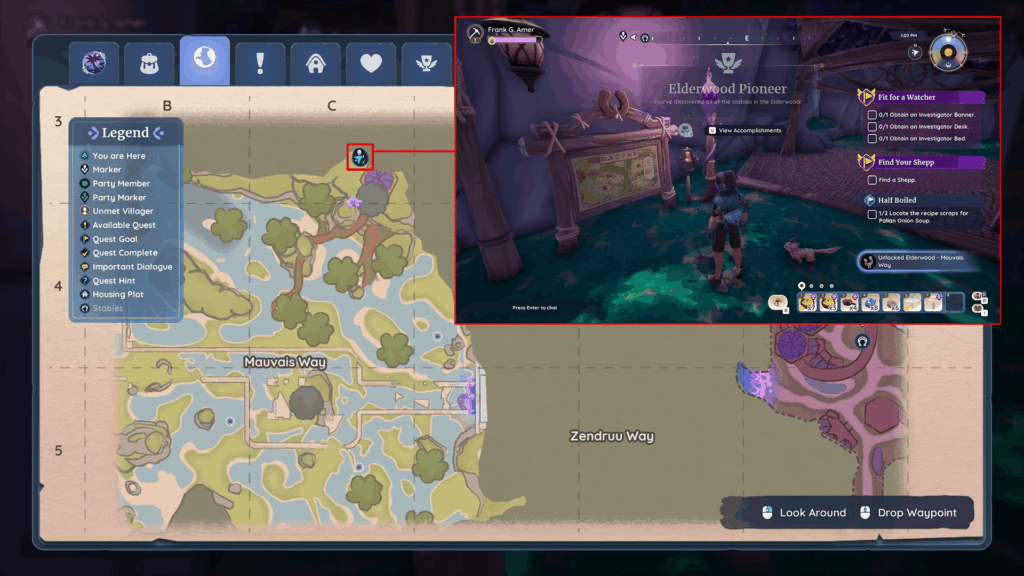
Side note: You can claim an Elderwood Small Lamp furniture piece just a few steps away from the stable sign. It’s the glowing flower on the ground, just along the edge!
And that’s a wrap for this guide! Unless they add new spots in a future update, that should be all of them done. You’ll get a bit of renown as a reward too, since finding all of them is a part of the Elderwood Pioneer accomplishment.