
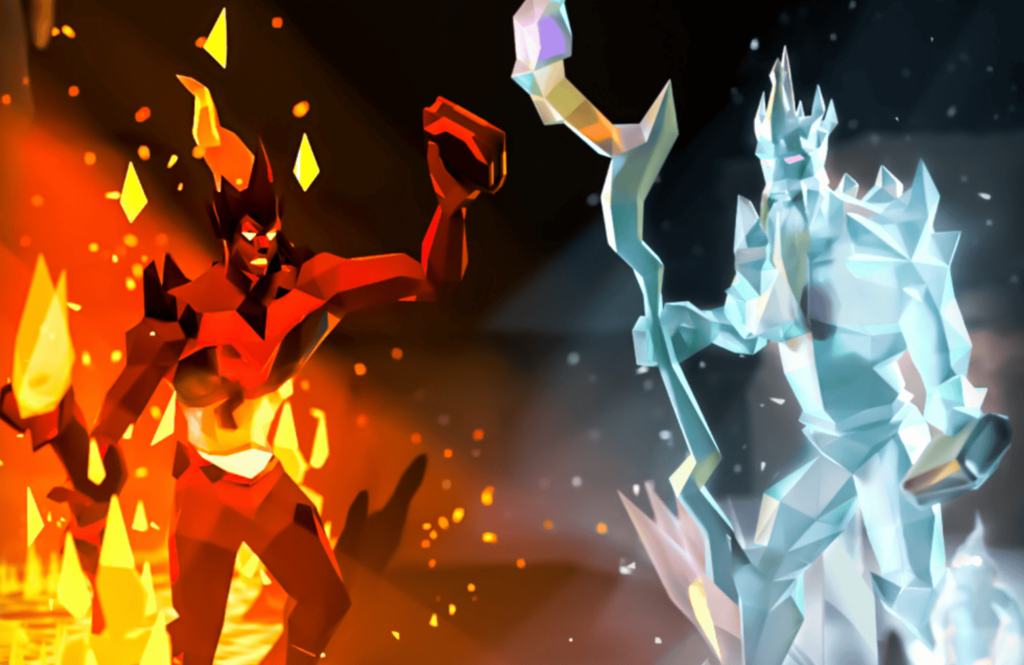
Old School RuneScape just released another update, which includes the new Royal Titans boss intended for duos who are trying to progress through the midgame stages. A lot of players, like myself, prefer doing stuff completely solo when possible, and this is a quick guide I whipped up after 10 solo kills (<5 mins each) on release!
Full video example at the bottom if you just want to watch the full fight play out!
Preparing for the Fight
In order to fight the Royal Titans, I recommend going in with at least 70 combat stats or higher (75 magic for Fire Wave) and a minimum of 43 prayer. You’re also going to need both magic and melee gear.
Just bring your best melee gear with you, as well as a couple of pieces for magic so you don’t splash on the bosses’ adds. If you’re comfortable with three-way switches, bringing ranged gear with you will speed up your kills, but this is completely optional.
Here’s what my personal setup looks like as a midgame Ironman without Void gear, with the goal of having as few switches as possible:
- Melee & Ranged Gear
- Weapon: Abyssal Whip / Hunters’ Sunlight Crossbow
- Off-hand: Dragon Defender
- Helm: Neitiznot Faceguard
- Back: Ava’s Assembler
- Top: Karil’s Leathertop
- Bottom: Karil’s Leatherskirt
- Gloves: Barrows Gloves
- Boots: Rune Boots
- Ring: Berserker Ring (i)
- Amulet: Amulet of Glory
- Magic Switch
- Weapon: Lava Battlestaff
- Top: Ahrim’s Robetop
- Bottom: Ahrim’s Robeskirt
- Supplies
- Prayer potions
- A bit of food
- Runes for water and fire wave (lower can work, but waves are ideal)
- Combat potions (optional but nice to have)

Where Are the Bosses Located?
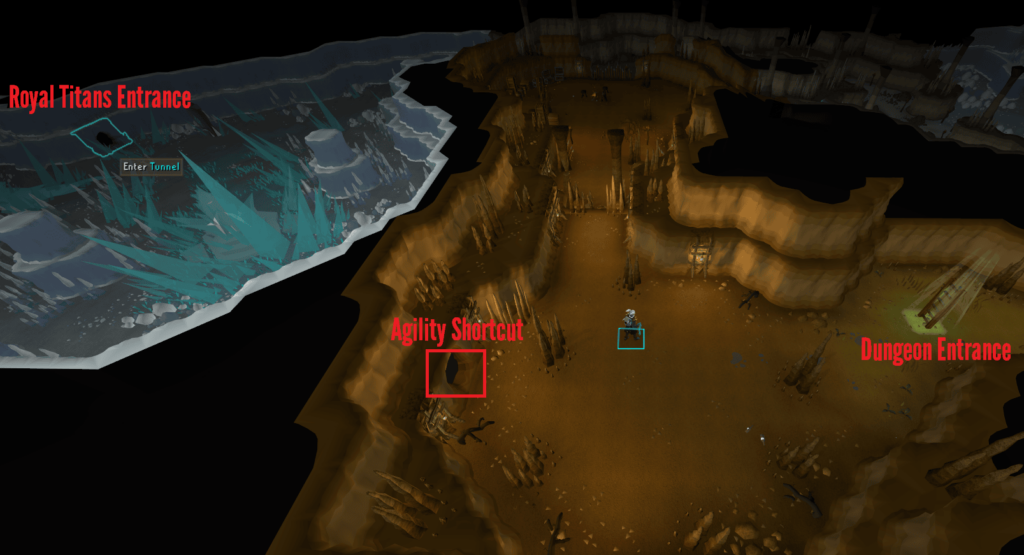
To get to the Royal Titans, travel to the Asgarnian Ice Dungeon far south of Falador. A quick way to get there is to use a fairy ring to teleport to Mudskipper Point (AIQ) and then running up the hill to the north.
Once inside, go to the area with ice giants to the west. There’s an agility shortcut near the ladder once you enter the dungeon, though I’m not sure what level is required since I can just kinda use it already.
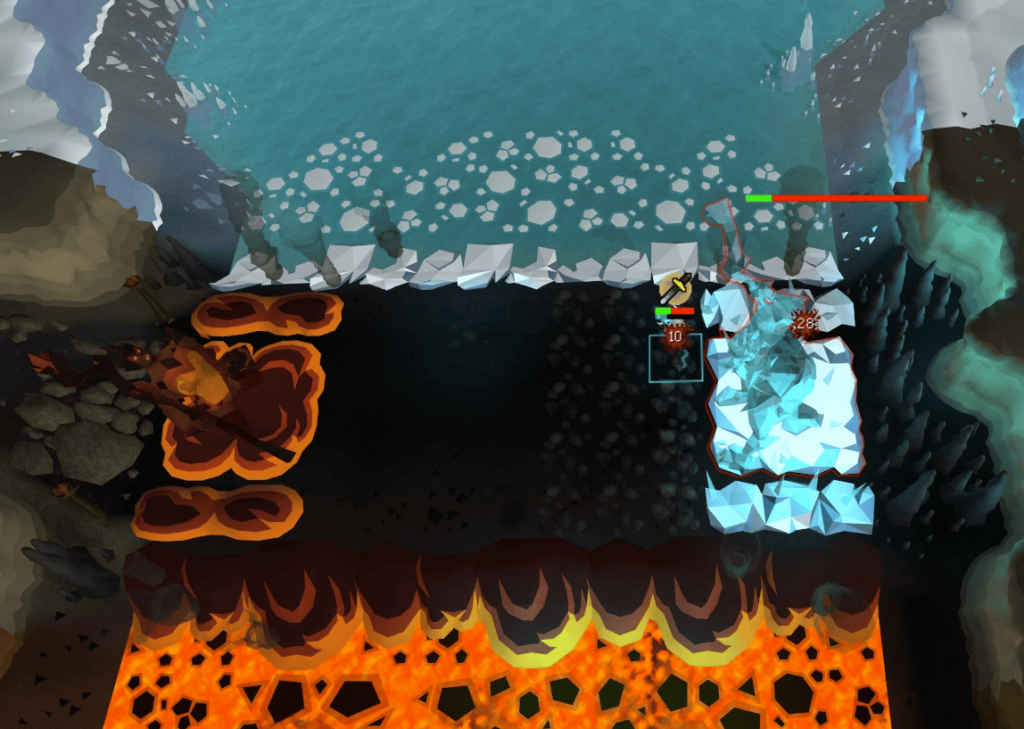
Fighting the Royal Titans
First Phase – Roaming Giants
Upon entering the arena, both Branda (Fire) and Eldric (Ice) will start walking around their respective sides of the arena. At this moment, they can’t be attacked unless you have ranged gear with you.
Turn on Protect from Melee and keep it on for the entire fight. As they’re walking around, they’ll occasionally create lines on the floor with their respective elements. Whenever they do this, you can clear out parts of it by using the correct elemental spell.
Icicles are weak to fire spells, while fire is weak to water. Try your best to target the penultimate segments before the edges, as adjacent parts are cleared whenever you hit it. You’ll want to have the edges open for the next part.

Melee Portions
Every now and then, either or both of the giants will say something like “You can’t escape me!” or “Time to feel my strength!” Whenever they do this, they’ll walk closer to you and be within melee range.
During this time, they’ll start doing area of effect attacks that you’ll be completely safe from as long as you keep Protect from Melee on. Start attacking one of them with melee until they turn back around. Once they turn around, they’ll walk away, which means it’s time to get back to your ranged gear if you brought any.
Summoning Minions
After a melee portion, they’ll start summoning minions. Again, fire kills ice and water beats fire. What you want to do is switch to your magic gear and target the middle one in each pile, or wait until they’re all clumped up before hitting them with a spell.
Your elemental spells become area of effect attacks on these minions, so you only really need to hit one of each type once they’re together. Fire/Water Wave takes them out in one hit, while weaker spells do not. I brought blast spells for my first ever attempt, and it took two hits to take them down.
Don’t forget to switch to mage gear! Not doing so will result in you splashing against the minions. If left unattended, these things will eventually detonate and deal damage to you.
BONUS TIPS:
- Set your staff to autocast one of the elemental spells so you’ll only need to manual cast for the other set of minions.
- Focus on the boss whose minions you have to manual cast against. Once they’re dead, that element will never show up again, which further simplifies the minion-clearing process later.

Second Phase – Stationary Giants
Eventually, and I’m not sure if there’s a health threshold that triggers it (I think it’s around 200hp for one boss), both of the bosses will teleport to opposite edges of the walkway. From this point on, they’ll always be vulnerable to melee attacks, and they’ll stop doing the icicle/fire mechanic on the floor.
The only change during this phase is that they will occasionally charge up an arena-wide attack. When this happens, a fire & ice-themed Yin-Yang symbol will appear somewhere on the floor, which will have a timer on it.
You have to step on that symbol and wait until the attack starts and ends. If you’re standing anywhere outside of it during the attack, you’ll start taking a lot of damage. While waiting for it to end, you can switch to ranged gear and continue attacking one of the bosses.
That’s really all there is to this phase. They’ll also continue summoning minions, so be ready to switch to magic gear every now and then.
One Boss Down, The Other Grows Stronger
When you take down either of the Royal Titans during this phase, the other one will grow stronger, as indicated by their dialogue. From here on out, they can deal damage to you even while you’re praying melee.
Keep Protect from Melee on. Seriously, just never turn it off until the fight is over and you’ll be completely fine. You might need to eat a few pieces of food because of the chip damage, but as long as you’re praying and not ignoring the minions, you won’t be in any real danger.
Once both bosses are down, that’s it! Pick whichever one you want to loot from (you can’t take from both) and either wait for them to respawn or leave the arena to heal and resupply.
If you prefer watching a video of the whole fight, below is an example that I saved. It’s my third ever kill (and second ever trip), so it wasn’t as smooth as later attempts, but it should be enough to clue you in on how the fight works:
If you don’t want to spend prayer potions on the fight, check out this guide on an alternative that’s free. The only catch is that you’ll probably need to do a bit of hunter training first…